

Paxton Net2 Attendance
Paxton


The Paxton attendance tool, available with Net2 Pro only, is a detailed version of the Who’s.in and Clocked. in HTML page. This tool will show the people who are present within a building by colour association on the screen. The sizes and colours can be altered to your own preference. You can choose to show people present by department or area. It’s also possible to place people in another area or clock them in or out manually
The tool gives an overview of people present within a building. When users present their token to a reader to open a door they will be signed in automatically and show as present in the attendance tool. When the user presents their token to the reader on leaving the building, they are then displayed as absent in the display. Net2 will need to have Areas setup in order for this to function correctly.
The tool can also be used as an overview to show all the users that are clocked in. Clock in and clock out readers are generally placed by the main entrance and don’t control door access. These clock in and clock out times are saved in timesheet and can be used for administration purposes. Areas are not required for this overview as it will just display whether the user has clocked in or out.

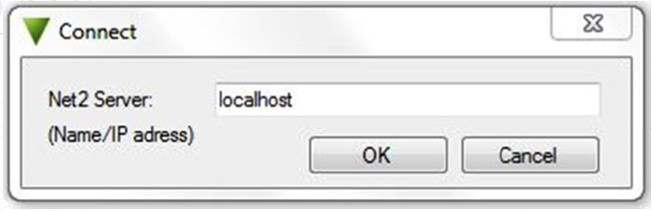
4. When installed on the Net2 server simply enter ‘localhost’ as the server name to connect. If installing on a Client machine, enter the IP Address or name of the PC running Net2. Click OK to continue.
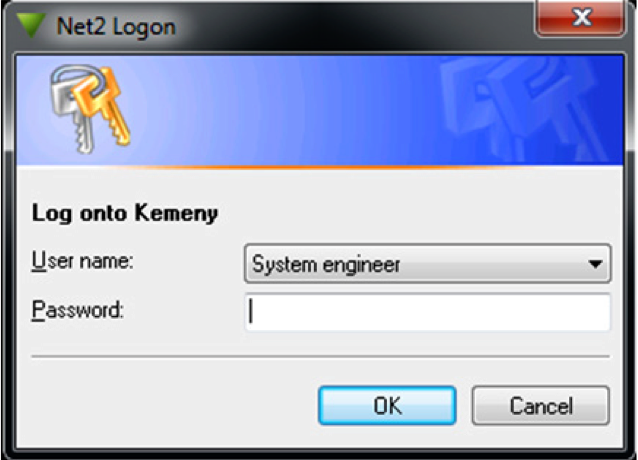
5. A login screen will appear, login using the same username and password as you would use for Net2
1. After login, choose whether to show ‘Attendance’ or ‘Clocked in’.

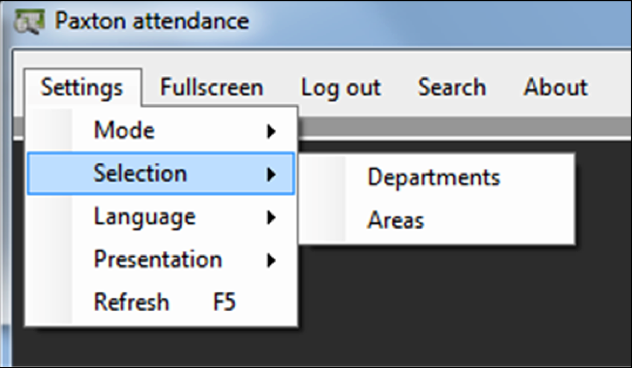
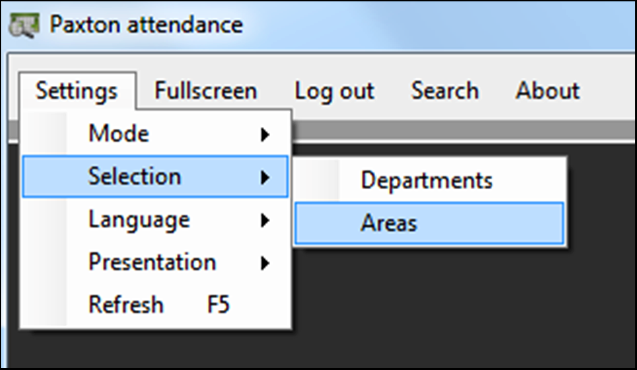
2. The departments to be displayed, can be chosen in the Menu ‘Selection>Departments’. You will now be able to see all users who are present or who have clocked in for each department chosen.

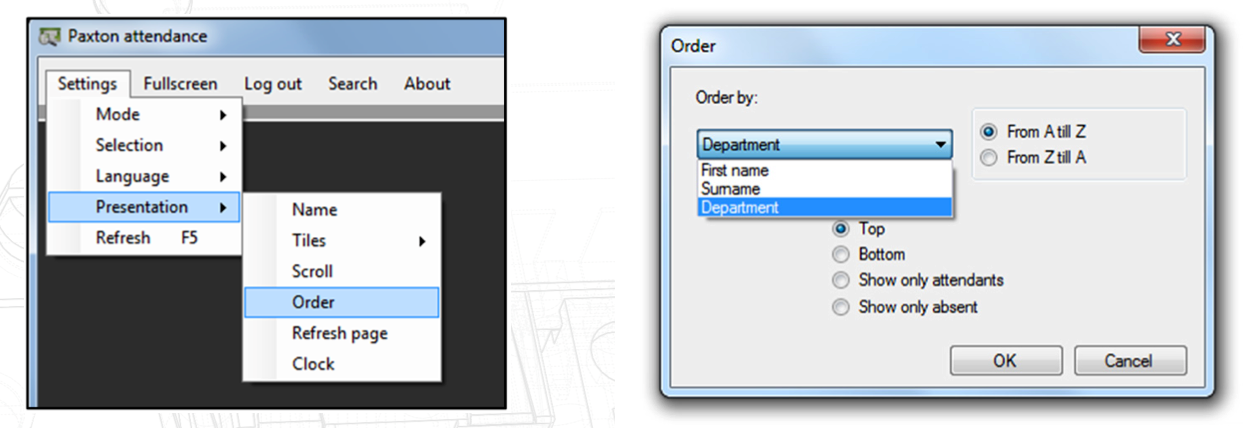
This can be ordered by ‘Department’ or ‘First name’ or ‘Surname’.
4. As an alternative to Departments, you can also choose to view Areas. People who have clocked in within the chosen area (floor, building or door) will be shown in the same way as the ‘sort by’ options (Department, First name, Surname).
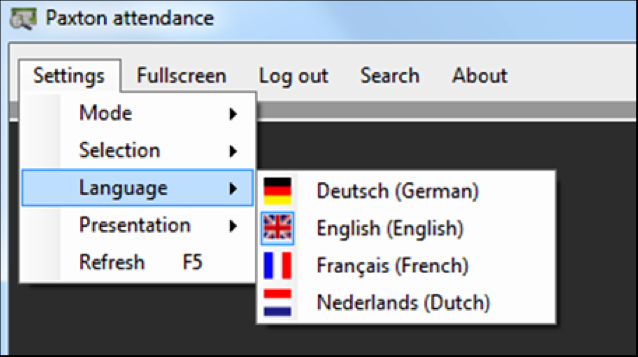
In the settings menu select the language (English, German, French or Dutch).
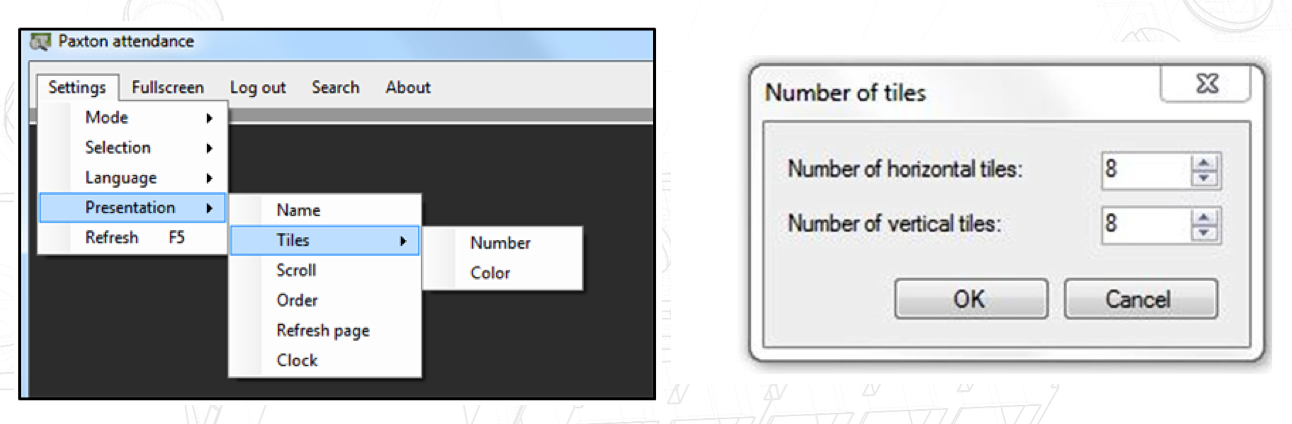
Depending on the size of your screen, select how many tiles you would like (both horizontal and vertical) and choose which colour the tiles will be for absent and present users.
If some of the tiles are not visible within the Attendance tool due to the size of the screen, you can set how you want this presented.
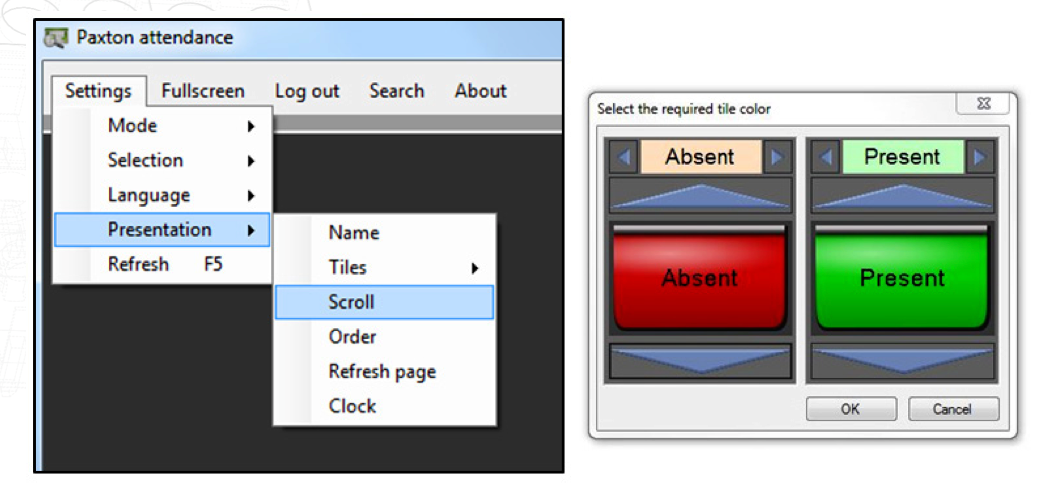
There are 4 options available:
1) Manual: The user must scroll down to show the tiles that are not shown first
2) Scroll page: scrolling after a certain time (at an adjustable speed) automatically to the next page
3) Scroll line: scrolling after a certain time (at an adjustable speed) automatically from the first line of tiles down
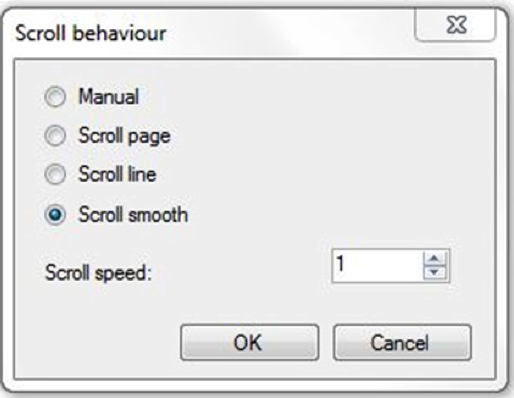
4) Scroll smooth: The display gradually shifts down (at an adjustable speed) Speed can be adjusted by altering the ‘Scroll speed’
After presenting a token to a reader, the system needs some processing time in order to display the user status.
You can choose how often you want to refresh the page and how quickly you get the latest information (minimum 5 seconds).

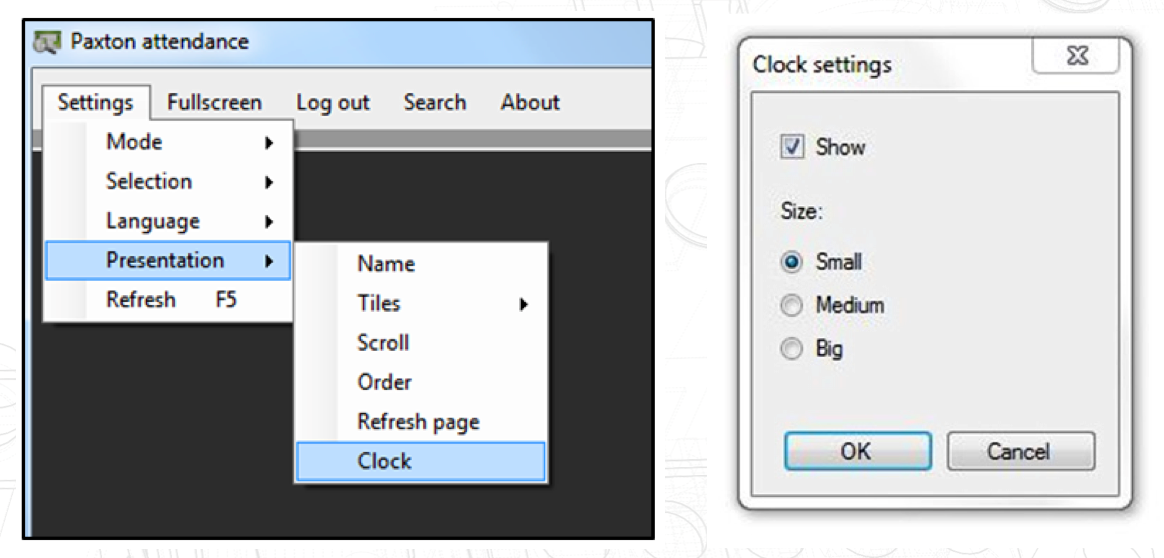
In settings, select Presentation>Clock and select the size of the clock which is displayed at the bottom, right hand corner of the screen.
The attendance tool is free to download and gives a great example of the capabilities of our SDK. The tool is not supported by Paxton directly and any support related enquiries should be directed at the developer.
For more information on how to download the tool, please contact our Support team on 01273 811011 or email support@paxton.co.uk.

At All Secure, we are dedicated to delivering superior service; enabling our clients to trust us and recommend us to others.


